Hello! :]

Showing posts with label Eyeshadow Tutorial. Show all posts

Sunday, October 27, 2013

Tutorial: Fall Eye Look 2013

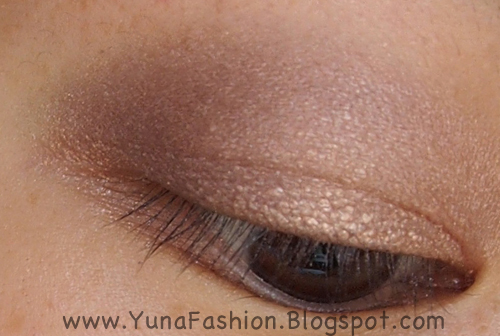
Finished Look:

What I Used:

1) 3 Mac Single Eyeshadows in: "Saddle", "Goldmine" and "Vanilla"
2) Missha Signature Velvet Art Shadow in "Plum Combination"
3) Mac Single Eyeshadow in "Satin Taupe"
4) Maybelline Color Tattoo Cream Eyeshadow in "Tough as Taupe"
5) Stila Matte Black Eyeshadow
6) Mac Fluidline Gel Eyeliner in "Black Track"
7) Shu Uemura Eyelash Curler and Buxom Mascara
8) All the brushes used in this tutorial are E.L.F

Tutorial:

Step 1
Apply a creamy eyeshadow base all over the lid that way the eyeshadow will stay vibrant.


Step 2
Apply a taupe eyeshadow all over the lid on top of the creamy base


Step 3
With a pencil crease brush, apply a black eyeshadow on the outer corner only


Step 4
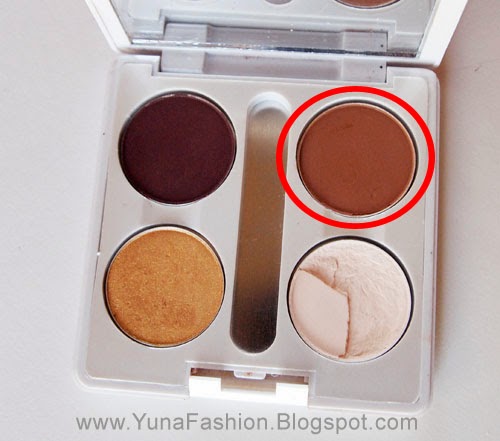
Now with a fluffy crease brush, apply a matte light brown shadow on to the crease, blending the black and taupe eyeshadow together to create a transition shade.

Step 5
With a same eyeshadow brush for the taupe on "step 2" apply a shimmery gold shadow on the middle of the lid.


Step 6
Apply a nude/cream color eyeshadow on the browbone and blend out any harsh lines.


Step 7
Apply eyeliner on the top lid only


Step 8
On the bottom lid, apply a plum/purple shade


Step 9
Curl lashes and apply your favorite mascara

And you're finished!

I enjoy this look because not only it's wearable but you can add a pop on color on the lower lash line and it won't look over the top.

Hope you like it and thank you for reading!  Please follow and leave me a comment <3 p="">
Disclaimer: everything used in this tutorial is purchased by me :]

Sunday, September 16, 2012

Tutorial: Fall Look (2012)

Finish Look 


What I Used
(Click on photo to see the product names)


Step 1) Apply a creamy golden eyeshadow base all over the lid.


Step 2) With a dense brush mix the skin tone and a light mauve shade and apply it over the lid.

Step 3) With a crease brush apply a purple shade on the outer corner and crease.

Step 4) With a smaller crease brush apply a deep green/brown shade on the outer corner only.

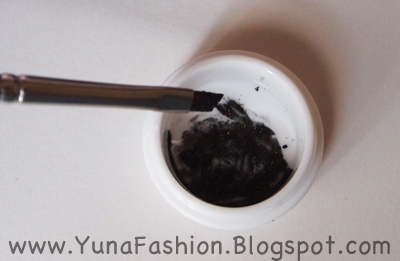
Step 5) Add one drop of the makeup sealer (or water) on to a clean container.

Step 6) Now mix any black or dark tone eyeshadow pigment to create a eyeliner.

Step 7) Line the eyes with the mix created.

Step 8) Line the bottom lid with the same purple eyeshadow from "Step 3".

Step 9) Apply a nude eyeshadow on the brow bone and blend out any harsh lines.

Step 10) Curl lashes and apply mascara.

And you're finished!
Thank you for reading!

Disclaimer: I purchase everything used in this tutorial.

Sunday, March 11, 2012

Tutorial: Cherry Blossom Look

Finish Look:


What I Used:

1) Coastal Scents 88 Eyeshadow Palette
2) Clinique Eyeshadow Quad (was from a gift with purchase from Clinique)
3) Milani Retractable Eyeliner
4) NYX Jumbo Eye Pencil in "Cottage Cheese"
5) Maybelline Pulse Perfection Mascara and Koji Eyelash Curler

Tutorial:

Step 1) Apply a white eyeshadow base all over the lid and smooth it out with your fingers.


Step 2) Apply a pale pink eyeshadow all over the lid.


Step 3) With a crease brush apply a light pink shadow (arrow on the photo) on the crease and outer corner.


Step 4) On the outer corner apply a mixture of the plum and brown shade with a crease brush.


Step 5) With a clean fluffy brush, blend out any harsh lines.


Step 6) Instead of doing my usual eyeliner, I am only going to tightline and apply liner on the waterline.


Step 7) Curl lashes and apply mascara and you're finish!


Thank you for reading!

Disclaimer: everything used in this tutorial is purchase by me

ad